 This is a very simple lock to make as the design is compact and there are no complex parts to it. I have seen numerous keys in museum collections of the same style so it's an easy assumption that the mechanism was often used.

Locks I've made described as "Style 2" locks in the discussion from the link above.
This is a very simple lock to make as the design is compact and there are no complex parts to it. I have seen numerous keys in museum collections of the same style so it's an easy assumption that the mechanism was often used.
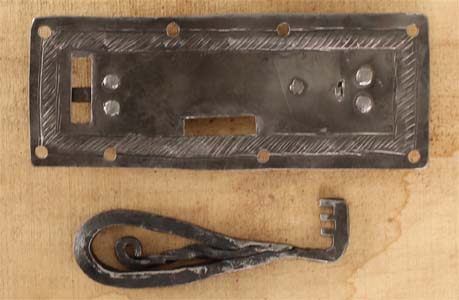
The key is used by inserting it, turning it vertical and finding the holes in the sliding bolt's plate, then pulling the key towards yourself to release the spring, then sliding the key to the right.. The sliding bolt moves with a very satisfying click.
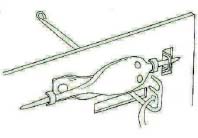
To the right you see an illustration of the lock's mechanism. The keys that work for this lock were found in all sizes, larger ones were assumed to be door keys.
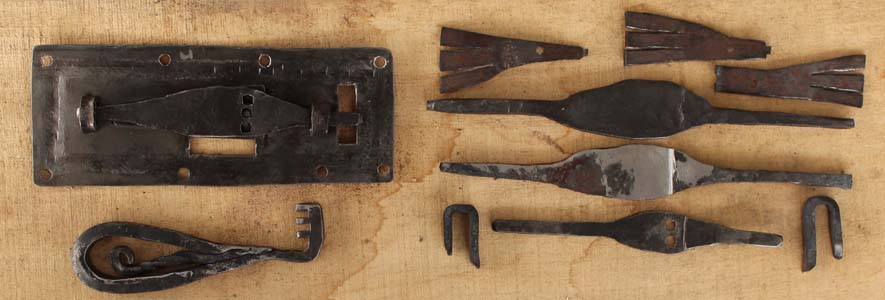 The backside shows the workings, and along side are components for three more locks of the same style. The spring is mounted first. I used a recycled handsaw blade as the material to cut the springs from. After annealing the metal, I cut out the springs shapes with a cold chisel. I then weakened the spring a little by filing the metal thinner right at the "finger's" bases.
The sliding bolts are filed to have a catch that permits the springs to hold the bolt in place. The key reaches through the holes to push the spring out of the way. Simple.
To the right of the assembled lock are components of three more locks, yet to be assembled. Though each unique the function of these locks is the same. Of the lock parts shown, the top bolt is rough forged, unfiled. The second shows the filing being done and the third has the key holes drilled. That third lock will use a two fingered spring.
The staples were filed to have shoulders that controlled their stand-off depth, then peened over on the front side of the lock plate.
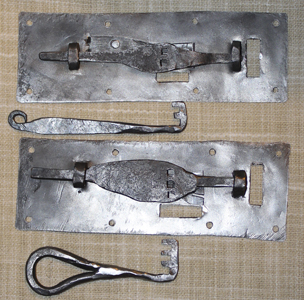 To the left, are the two locks made from the parts in the photo above. These are very simple locks to build and a peasure to operate. Now I need to consider making chests for both.
Being that the easy waay we now check for carbon content is to lay the metal against our electric grindestones wheel and look at the patern of sparks... and that carbon content was not understood, I would like ot beleive I stumbled on a minor work (or re-work.) that created something useful form junk.
I have that third loose part pictured in the first photo, that will be made into a lock too, more to come.